Decorative chips are small pieces of materials that can be added to paint to create a textured, decorative finish. Some people are worried that mixing decorative chips into latex paint will cause the paint to chip or peel.
You might wonder whether you can put decorative chips in latex paint to add a little extra pizzazz to your walls. The answer is yes. Adding chips to latex paint is a great way to add texture, color, and interest to your painting project.
But there are a few things to remember when adding chips to paint. In this post, we’ll share everything you need to know about adding chips to latex paint, including how to prepare your surface and what type of chips work best.

How Can You Put Decorative Chips in Latex Paint?
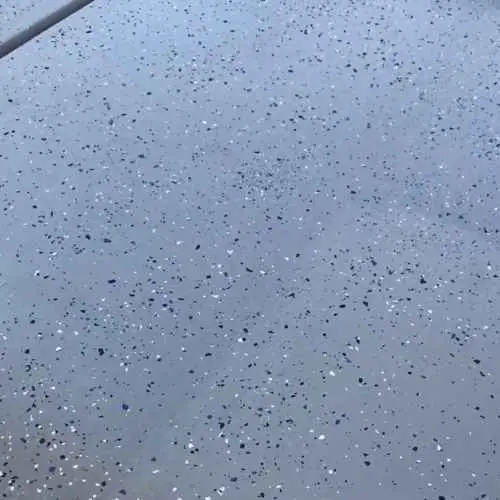
The addition of decorative chips to interior latex paint which is used for the walls and the ceilings adds interest and depth. The chips can be added to any paint color, adding a subtle shimmer and sparkle to the finish. You can find decorative chips at most hardware stores, which are relatively easy to apply.
The following are some steps for you to follow when painting with decorative chips:
Step 01. Choose the Right Type of Chip
Latex paint can be spiced up by adding decorative chips. But with so many different types of chips on the market, it can be hard to know which one to choose. Here are a few factors to keep in mind when selecting the right type of chip for your project:
Material: Decorative chips are made from various materials, including glass, metal, or plastic. The material you choose will impact both the weight and durability of the finished project.
Size: Decorative chips come in a wide range of sizes, from tiny flecks to large shards. The size of the chip will affect both the appearance of the finished project and the amount of coverage you can achieve.
Color: Chips are available in almost any color imaginable, so it’s important to choose a shade that complements the paint color you’ve selected.
Texture: Chips can have a Smooth or rough texture, which will also affect the overall look of the finished project. Smooth chips will create a more uniform appearance, while rough chips will add more visual interest.
Step 02. Prepare the Surface
The next step is removing loose latex paint, dirt, grease, or other contaminants from the surface. This can be done with various cleaners, depending on the type of surface you’re working with.
Once the surface is clean, you’ll need to roughen it up slightly, so the chips have something to grip. This can be accomplished by sanding or using a textured primer. Once the surface is prepped, you can start applying the chips.
Step 03. Apply the Chips
Before you start applying the chips, stir the latex paint thoroughly to ensure that the chips are evenly distributed. Once the paint is mixed, begin by dipping a chip into it and then gently pressing it onto the surface you are working on.
Continue applying the chips in this manner until you have achieved the desired effect. Remember that it may take several coats of latex paint to cover the chips fully. If necessary, trim away any excess chips with a sharp knife. Finally, seal the chips with a layer of clear sealer or varnish.

Step 04. Allow the Paint to Dry
Once you’ve applied the chips, allow the paint to dry completely. This usually takes around 24 hours, but it may take longer, depending on the type of paint you’re using. Once the paint is dry, you can enjoy your new, textured walls!
Keep in mind that latex paint with decorative chips will slightly increase the durability of the paint. But it’s still important to clean and maintain the surface regularly to ensure it looks its best.
Benefits Of Using Decorative Chips In Latex Paint
Decorative chips can be added to latex paint, offering numerous benefits. These chips not only enhance the aesthetic appeal of the paint but also provide a durable and slip-resistant surface. With a wide range of colors and textures, using decorative chips in latex paint allows for endless design possibilities.
Adds Texture And Depth To Your Walls:
-
- Decorative chips added to latex paint can create a visually appealing texture on your walls, adding depth and interest to any room.
-
- The chips blend into the paint, creating a unique and eye-catching design that cannot be achieved with plain, solid-colored paint.
-
- The texture created by the chips can give the walls a more dynamic and three-dimensional appearance, making them stand out and become a focal point in your living space.
-
- With a wide range of chip sizes and colors to choose from, you can easily customize the texture to match your personal style and enhance the overall aesthetic of your home.
Provides A Unique And Customized Look:
-
- Using decorative chips in latex paint allows you to add a personal touch to your walls, giving them a distinct and customized look that reflects your individuality.
-
- Each chip is unique, resulting in a one-of-a-kind pattern and design on your walls that can’t be replicated.
-
- The ability to mix and match different chip colors and sizes gives you endless possibilities for creating a look that is truly unique to your space.
-
- Whether you prefer a subtle and sophisticated design or a bold and vibrant display, decorative chips offer the versatility to achieve the exact look you desire.
Can Cover Up Imperfections And Flaws In The Wall Surface:
-
- One of the major benefits of using decorative chips in latex paint is their ability to cover up imperfections and flaws in the wall surface.
-
- The chips create a textured finish that helps to camouflage any dents, scratches, or uneven spots on the walls.
-
- Instead of spending time and money on extensive wall repairs, using decorative chips can be a simpler and more cost-effective solution.
-
- The textured surface created by the chips also helps to hide any minor imperfections that may occur during the painting process, ensuring a seamless and professional-looking finish.
By incorporating decorative chips into your latex paint, you can transform the appearance of your walls, adding texture and depth while achieving a unique and customized look. Additionally, the chips serve as a practical solution to cover up any imperfections or flaws in the wall surface.
Embrace the endless possibilities that decorative chips offer and give your walls a stunning makeover.
Tips And Tricks For A Stunning DIY Project
Start with a small test area to perfect your technique:
-
- Begin your decorative chip project by testing a small area of the latex paint surface. This will allow you to see how the chips adhere and whether the desired effect is achieved.
-
- Apply a thin layer of latex paint to the test area using a brush or roller, ensuring it is completely dry before proceeding.
-
- Sprinkle a small amount of decorative chips onto the painted surface, gently pressing them in to ensure they stick.
-
- Allow the chips to set for the recommended time before brushing off any excess. Evaluate the results to determine if any adjustments need to be made before continuing with the entire project.
Use multiple colors and sizes of chips to create a dynamic look:
-
- Opt for variety when selecting decorative chips for your latex paint project. Choosing chips in multiple colors and sizes will add depth and dimension to your finished product.
-
- Mix and match complementary colors to create a visually interesting effect. Consider using contrasting colors as well to bring a bold statement to your walls or furniture.
-
- Experiment with different chip sizes to create texture and variation. Using a mix of larger and smaller chips will help achieve a more balanced and dynamic appearance.
Experiment with different application methods for various effects:
-
- Brush-on method: Use a brush to apply latex paint to the surface, then sprinkle decorative chips onto the wet paint. Gently press them in to ensure they adhere, and brush off any excess once dry.
-
- Roll-on method: Apply a thin layer of latex paint to the surface using a roller. While the paint is still wet, sprinkle decorative chips over the painted area. Roll over the chips lightly to ensure they stick, and remove any excess once dry.
-
- Spray-on method: Transfer the latex paint into a sprayer and apply a thin coat to the surface. Immediately sprinkle decorative chips onto the wet paint, ensuring even coverage. Allow the chips to set and brush off any excess once dry.
-
- Trowel-on method: Use a trowel or putty knife to apply a thick layer of latex paint mixture to the surface. While the paint is still wet, sprinkle decorative chips over the entire area, pressing them in gently. Once the paint is dry, scrape off any excess chips with the trowel or putty knife for a textured effect.
With these tips and tricks, you can achieve a stunning DIY project using decorative chips in latex paint. Remember to start with a small test area to perfect your technique, and don’t be afraid to experiment with colors, sizes, and application methods to create a unique and dynamic look.
Maintaining Decorative Chip-Painted Surfaces
Decorative chips can indeed be mixed with latex paint, creating a unique and textured effect on surfaces. To maintain these painted surfaces, regular cleaning with a gentle detergent and soft cloth is recommended, along with avoiding abrasive scrubbing or harsh chemicals that could damage the chips.
Additionally, a fresh coat of clear sealer can be applied every few years to protect the paint and maintain its vibrant appearance.
Decorative chip painted walls can add a unique and eye-catching touch to any space. Whether you have just finished painting your walls with decorative chips or are considering it, proper maintenance is key to ensure they continue to look their best.
Here are some tips for maintaining the beauty and durability of your decorative chip painted walls:
Regularly Clean The Walls With A Soft Brush Or Cloth:
-
- Gently dust the walls using a soft brush or cloth to remove any loose dirt or debris.
-
- Wipe the walls gently in a circular motion to avoid damaging the paint finish.
-
- Use a mild cleaning solution if necessary, mixing a small amount of dish soap with warm water.
-
- Test the cleaning solution in an inconspicuous area first to ensure it doesn’t cause any discoloration.
-
- Avoid using abrasive cleaners or tools that may damage the paint finish.
Touch Up Any Chips Or Areas Of Paint Loss As Needed:
-
- Inspect your walls regularly for any chips or areas where the decorative chips may have come loose.
-
- Use a small paintbrush or touch-up kit to carefully fill in the damaged area with matching paint.
-
- Allow the touch-up paint to dry completely before reapplying any protective topcoat if necessary.
Remember that regular maintenance is crucial in preserving the appearance and longevity of your decorative chip-painted walls. By following these simple tips, you can ensure that your walls remain a stunning focal point in your home or space for years to come.
Do I Need a Primer for Latex Paint Chips?
As any painting contractor knows, choosing the right primer is essential for getting a good finish on latex paint chips. Latex paint is notoriously difficult to work with, and it can be even more challenging when trying to repair chips.
That’s why it’s important to select a primer that is specifically designed to work with latex paint. There are a variety of latex primers on the market, so it’s important to read the labels carefully to ensure you’re selecting the right one for your project.
Are Latex Paint Chips True to Color?
Latex paint chips are a more accurate representation of the true color because they consider both the pigment and the binder (the substance that holds the pigment together).
However, there are still many factors that can affect how a latex paint chip appears once it’s applied to a surface. The type of surface, paint & chips mixing properties, the lighting, and even the temperature can all play a role in changing the appearance of latex paint.
Do Latex Paint Chips Work on Garage Floors?
Whether or not latex paint chips will work on garage floor coating depends on a few different factors. The first is the condition of the floor itself. If the floor is in good condition, with no cracks or major damage, then the paint chips should adhere fine.
Another factor to consider is the type of paint used. Some latex concrete paint is designed specifically for use on floors, and these will usually work better than regular latex paints.
Finally, it’s important to ensure that you follow all of the instructions on the garage floor paint can before applying the paint chips. If you do not prepare the surface or apply the paint properly, it is likely that the paint will not adhere correctly and could start to peel off soon after it is applied.
Conclusion
Adding decorative chips to latex paint is an easy way to add texture and interest to your garage floor, walls, or any other surface. However, it’s important to take the time to prepare the surface properly and to use the right type of paint to ensure that the chips adhere correctly.
And remember, take safety precautions when working with paint, chips, and other materials. Always wear gloves, a mask, and eye protection when working with these products.

S. Pushon is a paint expert, self-taught artist, and currently working as an adviser in the paint industry as a Quality Improvement and Development Assistant.
An artist by heart, he draws remarkable art pieces and as a professional paint industry individual, he seeks the insight and shares with enthusiasts. Read more…
