If a durable, fuel-resistant finish is what you desire, enamel paint should absolutely be the number one choice. It’s known for its longevity and unmatched performance. This isn’t just any type of paint; it’s powerful. Enamel paints are composed of a combination of resins and solvents that create a hardened coating used to protect surfaces.
And though enamel is well-known for its resilience when faced with oil exposure, it’s essential for those using it to understand how to apply the product correctly to ensure the best results and optimal protection from oil exposure. But one of the questions many people have: is enamel paint fuel resistant?
Let’s examine why these matters and what you should know about enamel paint and fuel resistance.
Different Types of Enamel Paint
Acrylic Enamels
Acrylic enamels are water-based paints that are ideal for indoor use because they dry quickly and have low levels of VOCs (volatile organic compounds). They provide excellent coverage on metal surfaces but can be difficult to apply on wood due to their low adherence properties.
Acrylic enamels are easy to clean up and can be washed with soap and water without damaging the surface underneath.
Alkyd Enamels
Alkyd enamels are oil-based paints that offer superior adhesion on wood surfaces compared to acrylic enamels. These paints take longer to dry than acrylics, typically 24 hours or more; but they provide better protection against moisture damage, scratches, and fading from UV light exposure.
Alkyd enamels can be tricky to clean because they require mineral spirits or turpentine for cleanup instead of soap and water like acrylics do.
Urethane Enamels
Urethane enamels are oil-based paints that are designed to provide exceptional durability when applied properly. They form a tough film on any surface they cover which makes them ideal for outdoor applications such as metal fences or wooden decks.
Urethane enamels can be more challenging to work with since they require an activator solution in order to cure properly. Additionally, these paints tend to emit strong odors during application so using them in enclosed areas may not be ideal unless there is good ventilation available.
Benefits of Using Enamel Paint
a) Durability:
Enamel paint offers many benefits for a variety of home improvement projects. Most notably, enamel paint is characterized by its durable qualities. This type of paint forms a hard surface coating when it dries, making it more resistant to damage from everyday wear and tear than other kinds of paint.
b) Variety of Colors:
The variety of colors available for enamel paints allows homeowners to find the perfect hue for their project that will resist fading and discoloration over time. From basic tones such as black and white to eye-catching shades like teal, pink, burgundy, olive green, and more. Furthermore, due to its glossy finish, those with deeper hues have an added level of shine that makes them truly captivating.
And the thick consistency offered by fewer coats of enamel paint is necessary to cover an area, making it both cost-effective and a quality choice for all kinds of painting projects.
c) Weather Resilience:
Enamel paint is highly resistant to weathering and fading due to its heavy-duty nature. This makes it an ideal material for outdoor projects such as fences or decks because it won’t fade in the sun or become damaged by rain or snow.
This means that your project will stay looking good year after year no matter how much weather it has endured.
d) Aesthetic Appeal:
Enamel paint provides a glossy finish which enhances the aesthetic appeal of any project it is applied to. The glossy finish adds an extra layer of sophistication and class that other paints simply cannot provide; this makes it perfect for furniture and accessories around the home as well as large-scale projects such as walls or ceilings.
How Does Enamel Paint Become Oil Resistant?
Additives
The key to making enamel paint oil-resistant is to add certain additives during the manufacturing process. These additives are designed to reduce the surface tension of the paint so that it repels oil rather than absorbing it into its coating. The result is an oil-resistant layer of protection that makes the surface easier to clean without damaging the underlying paint.
Resin
In order to make enamel paint truly oil-resistant, manufacturers use special resins in their formulas. These resins form a protective film over the surface of the painted area that helps prevent oils from penetrating through and damaging the underlying paint job.
The resin also helps create a strong bond between the protective film and the underlying surface, making it even more difficult for oils or other liquids to penetrate through.
Film-Forming Agents
In addition to resin, some manufacturers also use film-forming agents in their enamel paints in order to make them more oil-resistant. Film-forming agents are added during the manufacturing process as well and help create a thin protective layer on top of the painted area that prevents oils from seeping into and damaging the underlying surface. The result is an exceptionally durable coating that stands up against even heavy exposure to oils or other liquids.
How to Apply Enamel Paint for Fuel Resistance
Step One: Preparing the Surface
The first step in any painting project is preparing the surface. This is especially important when working with enamel paint because it requires a perfectly smooth surface in order to adhere properly.
Start by making sure all surfaces are free of dust, dirt, grease, and oil. If there are any existing layers of paint or primer on the surface, make sure they are completely dry before proceeding to the next phase.
Once the surface has been cleaned and dried, you’ll want to sand it down until it is smooth and even. Use fine-grit sandpaper to ensure that all bumps or imperfections are removed and then wipe away any remaining dust with a clean cloth or rag.
When finished sanding, you may also want to use an appropriate primer before applying the enamel paint itself; this will help create a stronger bond between the surface and the enamel paint.
Step Two: Applying The Paint
Enamel paints typically need two coats for maximum coverage. In some cases, one coat may suffice depending on your particular needs. It’s best to start with thin coats so that they dry quickly and evenly without pooling or dripping onto other surfaces.
To achieve this effect, always use a high-quality brush with synthetic bristles (natural bristles tend to absorb too much paint). Also, choose a well-ventilated space where you can work safely without inhaling fumes from the solvent or enamel paint itself.
When applying your first coat of enamel paint, make sure that each brush stroke covers an entire area in one fluid motion; this will help ensure that no spots are missed during application and provide greater coverage overall.
Allow each coat of paint at least 24 hours to dry before beginning work on your second coat. Once both coats have dried fully you can proceed with step three.
Step Three: Finishing Touches
Once your second coat of enamel has completely dried (which could take up to 72 hours depending on climate conditions), you’re ready for the finishing touches. To add extra protection against fuel spills and exposure to sunlight, consider adding a clear sealant over the top of your finished job as an added layer of defense against deterioration over time.
Once sealed and protected against external forces like weathering or UV exposure, your fuel-resistant finish should look great while providing long-lasting protection.
Methods for Testing Fuel Resistance of Enamel Paint
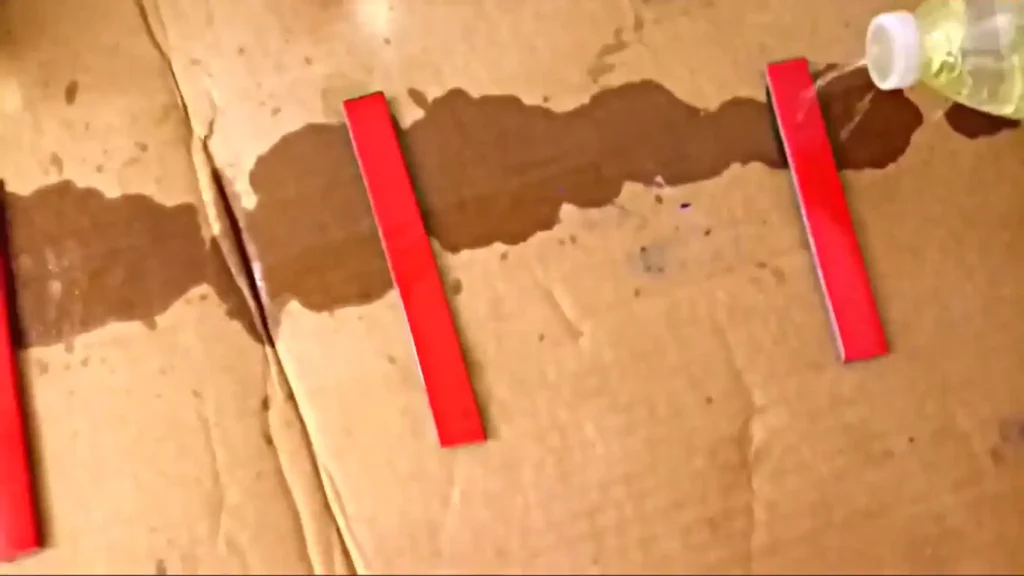
Water Repellency Test
The first test for determining the oil resistance of your paint is the water-repellency test. Simply place a small drop of water on the painted surface and wait 10 seconds.
If the water droplet beads up and rolls off, then your paint has passed this test. This means that any oils that come into contact with your painted surface should also bead up and roll off without causing damage.
Grease Resistance Test
The second test for gauging an enamel paint’s oil resistance is the grease resistance test. To perform this test, simply apply a small amount of cooking oil or butter to a cotton swab and rub it gently over the painted surface.
If no residue appears on the swab and no discoloration occurs on the painted surface, it passes the test as well.
Heat Resistance Test
Lastly, you can also use heat to determine if a particular type of enamel paint will be resistant to oils and other liquids. To begin, heat up a metal object such as a spoon or fork until it’s just barely warm (not hot).
Then firmly press it against the painted surface for 10 seconds; if no discoloration occurs after removing it from the surface, then your enamel paint has passed this third test as well
Conclusion:
The use of enamel paint for oil resistance is an excellent choice due to its versatility and affordability. Some of the most important benefits include being resistant to rust, corrosion, fading, and abrasion, as well as having minimal shrinkage and maximum color retention.
Several methods can be used to test oil resistance, such as Grease & Heat resistance as well as water repellency test. The results and tests can provide a sample assessment which will preferably determine the type of coating needed without any trials concerning the surfaces.
Therefore, when selecting paint for oil resistance needs it is important to look at how much budget there is in addition to the desired outcome that needs to be achieved. By considering these things, you are sure to get the right enamel paint and results.

S. Pushon is a paint expert, self-taught artist, and currently working as an adviser in the paint industry as a Quality Improvement and Development Assistant.
An artist by heart, he draws remarkable art pieces and as a professional paint industry individual, he seeks the insight and shares with enthusiasts. Read more…
